
Making #3; Incubator
Materials
- Insulated Foam Shipper, Medium, 17” Length x 10” Width x 8-1/4” Depth Amazon
- Cooling Fan, 40 x 40 x 28mm, 12V DC, 2.8 W Amazon
- Heating Element AC DC 12V Aluminum Shell Ceramic Heating Plate (220℃ 5—28W) Amazon
- Aluminum Heat Sink for Raspberry Pi 3 - 15 x 15 x 15mm, 4 of them Adafruit
- N-channel power MOSFET - 30V / 60A Adafruit
- Rotary encoder with switch EC11 Audio digital potentiometer 20mm handle Ebay
- Potentiometer Volume Control Rotary Knobs, 19.5x11.5mm, 6mm Shaft Hole Amazon
- DHT22 temperature-humidity sensor + extras Adafruit
- Quad Alphanumeric Display - 0.54” Digits w/ I2C Backpack, Red and Yellow Adafruit
- Rocker Switch, 16A 125V (450-1810-ND) Digikey
- DC Barrel Power Jack 2.1 X 5.5MM (839-1291-ND) Digikey
- Power Adapter DC 12V 3A, 36W Max Amazon
- LM2596 Step Down Module ebay
- Plain Expanded Metal Sheet, 24 x 1/2 x 12 in Homedepot
- PureBond Birch Plywood 1/4 in x 4 ft x 8 ft (actual thickness 5mm) Homedepot
Arduino code
Adobe Illustrator file 1
Adobe Illustrator file 2
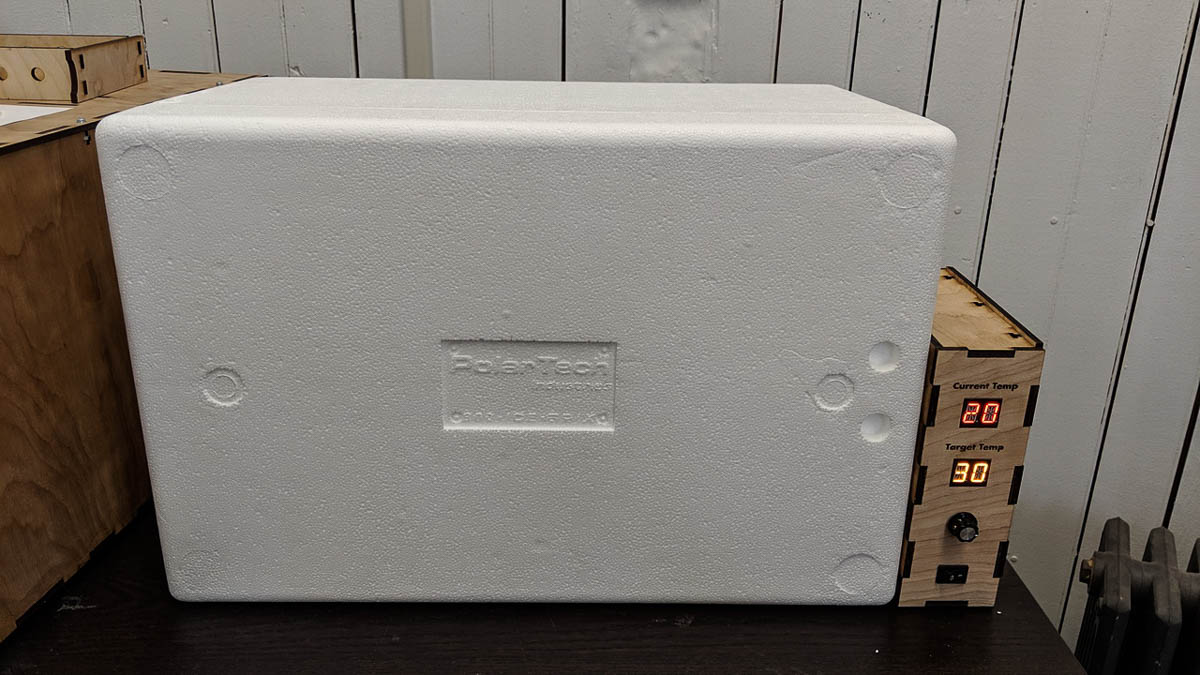
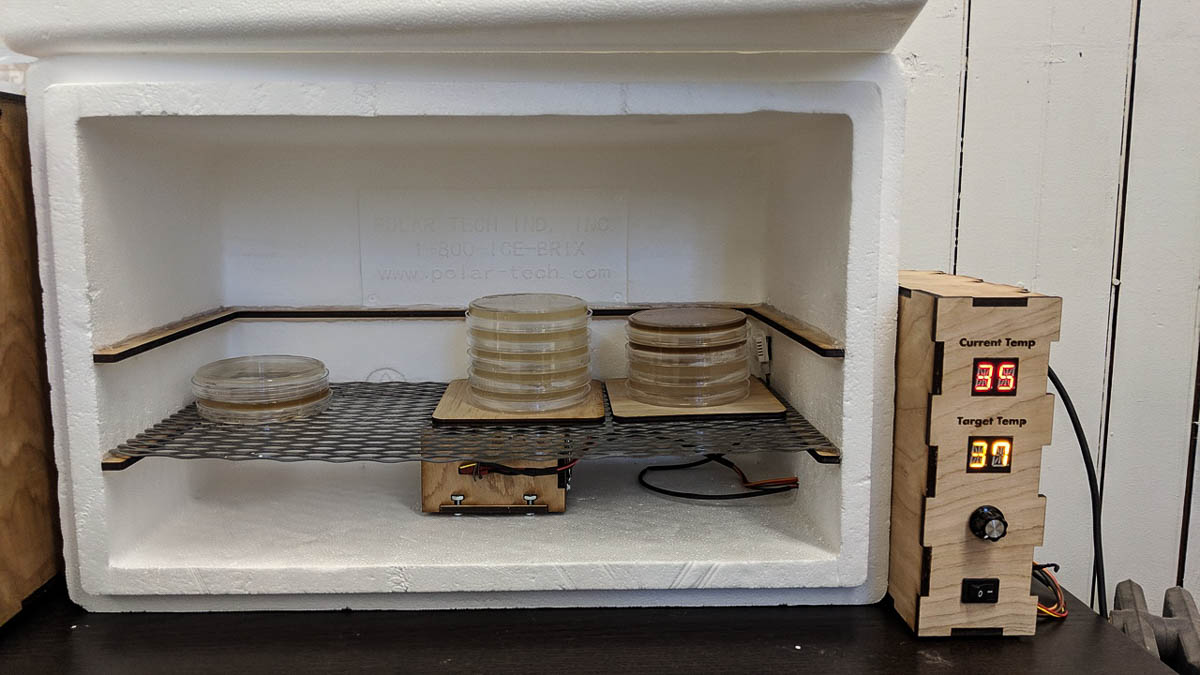
Main Compartment
This insulated shipping container retains heat very well. I was going to make a door with clear acrylic sheet but using the cover it came with was the best way to hold the heat inside. The low heat setting on my hot glue gun worked well when attaching rails for shelves but the high heat setting melted the foam. I used an expanded metal sheet as shelf but sometimes it got too hot. I may make a plastic shelf instead.

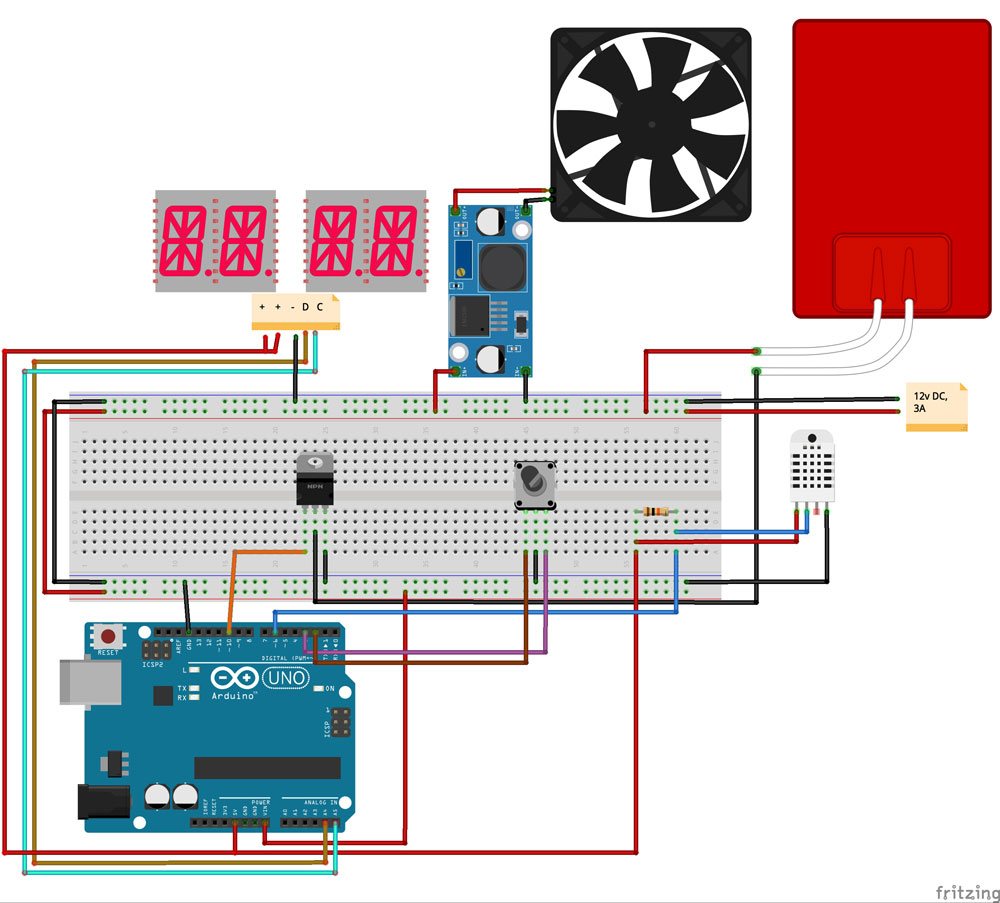
Heating Element
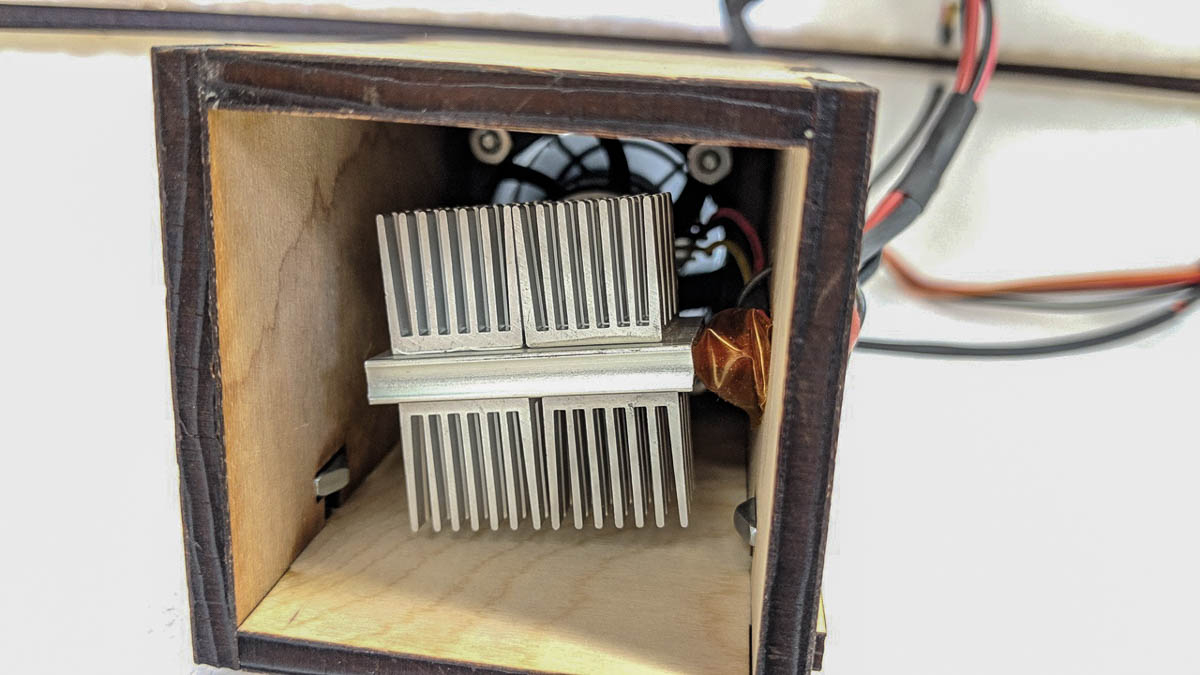
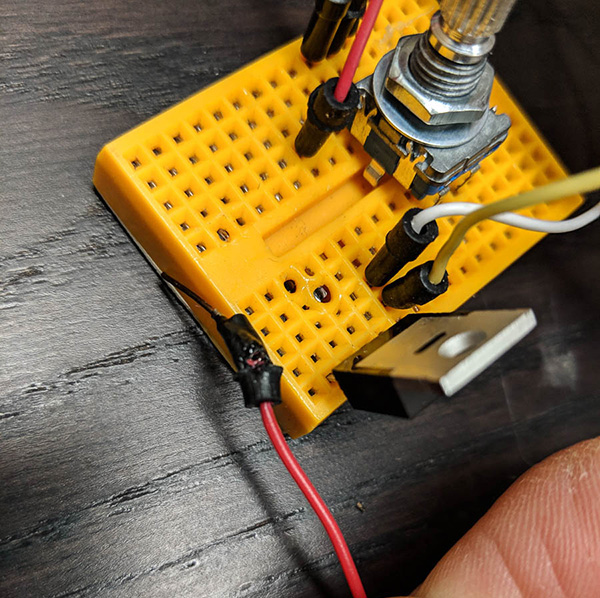
40mm cooling fan(12v, 2.8W) runs very fast and loud. In order to slow it down, LM2596 Step Down Module is used to drop down the voltage to about 9v and it is directly connected to 12v DC power source. I plan to use another MOSFET to control the fan speed depending on the temperature. Four aluminum heat sinks are attached to the heating element to dissipate the heat faster and it’s been very effective. The ground of heat element is connected to the drain of MOSTFET. Depending on the temperature, Arduino can control it from 0 to 255.

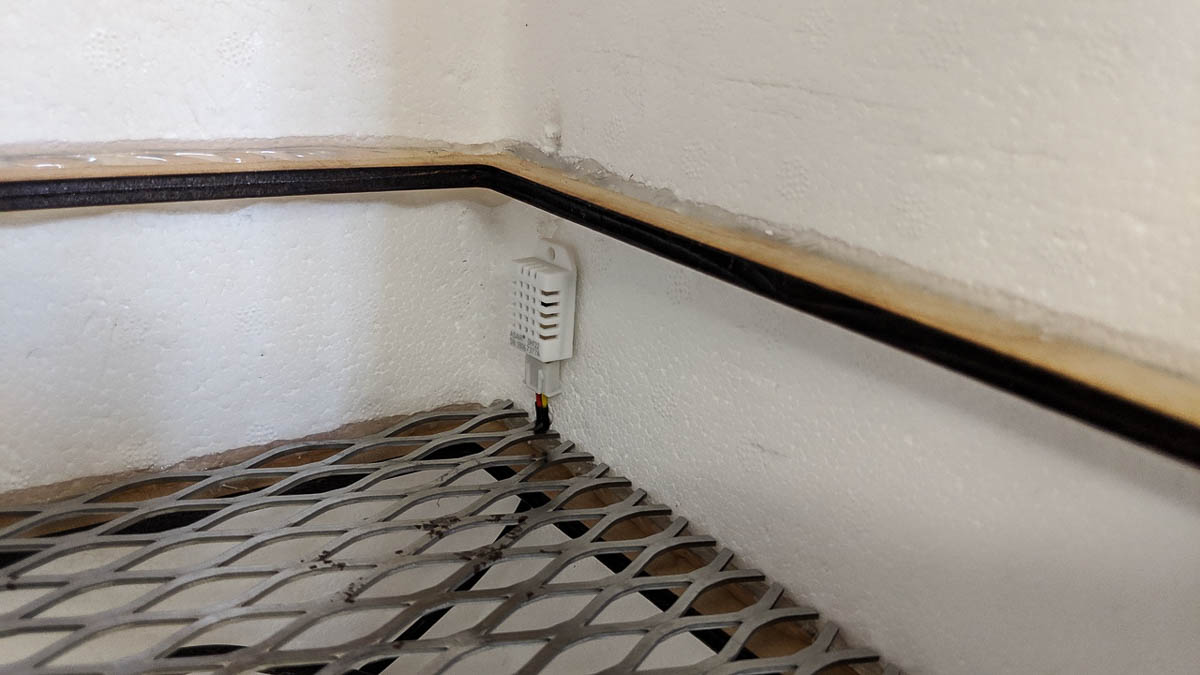
Thermometer
DHT22 is a reliable thermometer. More information and its tutorial on Adafruit’s page. The left pin of DHT22 goes to Arduino 5v. The second pin from the left connects to Arduino D6 and the right pin goes to ground. 10K resistor connects between 5v and signal, the second pin from the left.
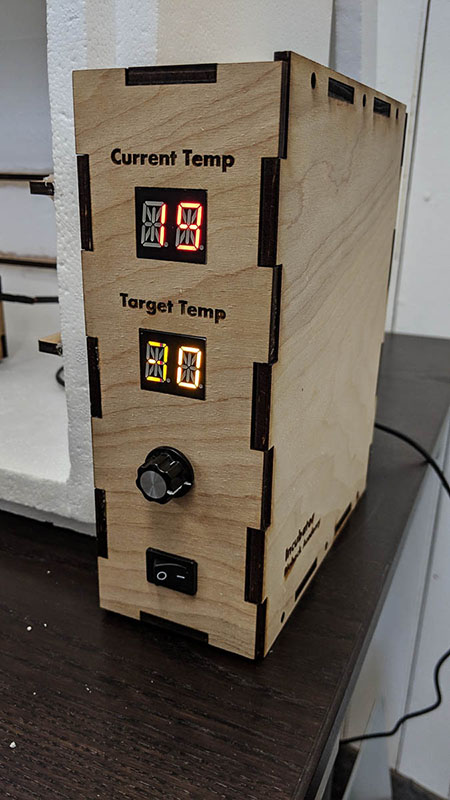
Control Box
This box is attached to the right side of the main compartment and there is a small hole for wires. Red and Yellow Quad Alphanumeric Displays are connected to one I2C Backpack from Adafruit. Its tutorial is available on their site. The backpack’s VCC and Vi2c connected to Arduino 5v, CLK to A5, DAT to A4 pin of Arduino, and GND is to the common ground. The red display shows the current temperature from DHT22 and the yellow shows a target temperature that can be set with the rotary encoder. If current temp is higher than the target, MOSTFET sends 0 to the heating element. If target is set higher than the current, then MOSTFET send up to 255 depending on the temperature differences. The rotary encoder’s pin A goes to Arduino D2 and pin B goes to D3. The ground pin goes to the common ground.
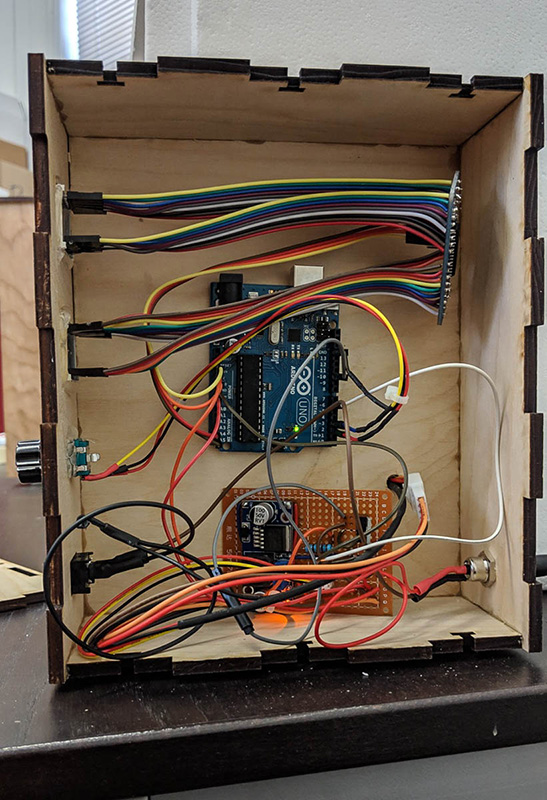
Because the heating element uses up to 28 Watt, sometimes MOSTFET got dangerously hot and melted a breadboard and jumper cable. When I used a PCB board for final version, I used wires that can handle higher wattages and temperatures. At the same time, I plan to add some of the safety measures such as a temperature activated kill switch in the future.
The original incubator design came from this instruction.